Ray Tracing with POV-Ray

Been experimenting with the Persistence Of Vision Ray tracer and have rendered a few images and animations (note: some GIFs may suffer from minor compression):

The splinefollow example in 3rd person; 20 frames, 12fps, 512×384 (3x size of original)
This GIF gives you more of an idea of how many frames were actually rendered. (note this has been reduced by 2 frames for some reason)
The splinefollow example in first person, 120 frames, 12fps, 512×384

I don’t take ownership of any of these animations, I just thought it’d be cool to share my renders here.

Anyway, thanks for spending your time to read this blog, and if your reading from the future, leave a comment, and like a video of mine (It’s really appreciated!)

And by the way, if you ever have any issues about or with this blog or project, or just want to share your results from it, create a thread in the website Forum. Thanks!

Avateering with Blender (Kinect 360)

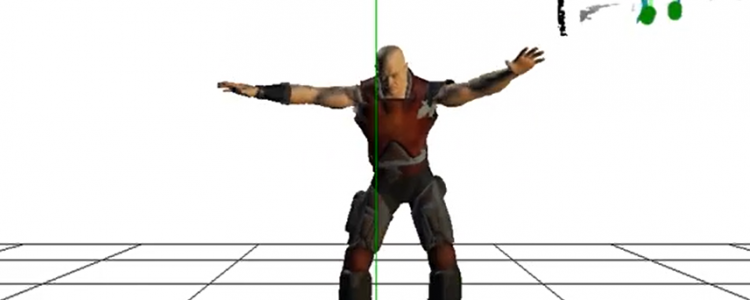
Avateering with custom characters using Microsoft’s solutions proved to be pretty difficult. That’s why I decided to try it out with Blender.

Interested in Microsoft’s XNA Solution? I did it too, here.
My YouTube video that I posted about this is below too.

Blender

Believe it or not, the movements from this animation were sourced from me, prancing around in front of a Kinect 360 in my conservatory.
This is thanks to an open-sourced program called kinect-openni-bvh-saver, which can record Kinect body tracking into a .bvh, which can be applied to rigs like the Mario in the video.

Installation and Use

Download the bvh saver (for windows) here (meshonline.net) – should be named mocap-x86-binary.zip and be 106MB in size – unzip it into a safe place (documents, etc).
Run the “mocap.exe” inside of the “bin” folder from root, and a cmd and window should pop up. If not, make sure your Kinect is plugged in. This window shows the camera feed as well as skeleton data. The .bvh file starts recording as soon as a skeleton is found.
Once the task/window is closed, the .bvh is saved to the “data” folder in the root of the installation.

Notes:
1. If none of this works, try and:
-Download Kinect for Windows SDK 1.8, install the SDK.
-Download OpenNI 2 SDK Binaries, install the SDK.
-Download NiTE-Windows-x86-2.2.zip, install the SDK.
-Download opencv 2.4.11 Win Pack, install the SDK to the root of drive C:.
2. Visit the GitHub page and read through the other information.
3. Make sure your Kinect is an Xbox 360 Kinect and not an Xbox One. This program will only work with Xbox 360 Kinects. However, it will work with up to 3 (and maybe more) !

I assume something similar is achievable with Kinect Studio, but it didn’t quite fit for avateering (I think :/ – pls leave a comment if you know anything about this) in the time frame I wanted.

The model was only a mesh when I imported it, but it didn’t really matter because the .bvh creates an animated rig when imported into blender anyway. So do some automatic weight painting, and if something is wrong you’ll have to manually paint. For example, Mario’s yellow buttons are not the same mesh as his overalls and were some reason auto weight-painted to his wrists. If you have no clue what I am talking about, learn more about weight painting in blender.

Once your animated rig is painted onto your model and it looks ok, you can export it. Want to export as an mp4? Here is the guide I used.
More info on exporting animations can be found in the blender documentation.

That should be pretty much it! Record your movements and transform yourself into whatever character you like!

Anyway, thanks for spending your time to read this blog, and if your reading from the future, leave a comment, and like a video of mine (It’s really appreciated!)

And by the way, if you ever have any issues about or with this blog or project, or just want to share your results from it, create a thread in the website Forum. Thanks!

XNA Game Studio for Visual Studio 2017 (Kinect 360 + Xbox 360)

An unofficial XNA Game Studio adaptation allows for XNA programs to execute on Windows 10.

The custom install allows Visual Studio 2017 to build the XNA Game Studio programs. Of course, I used the Kinect 360 to build an Avateering demo, which is basically a model that maps to your body movement in real time, and this is how it was done.

What is XNA Game Studio?

Microsoft XNA is a freeware set of tools with a managed runtime environment that Microsoft developed to facilitate video game development. XNA is based on .NET Framework, with versions that run on Windows and Xbox 360. XNA fully supports Kinect 360, and so when I wanted to mess with it I could either:

  • Write my own program with Kinect 360 support (from scratch)
  • Use XNA in some way

And that’s when I came across these.

Using Visual Studio

First you’ll need the Kinect 360 SDK from Microsoft. Version 1.8 is the latest compatible with Kinect 360. Don’t forget the Developer Toolkit, which includes examples and demos you can try. This also involves the files for the XNA Avateering demo mentioned earlier in the article.

Your Kinect 360 will also need an adapter, which allows the Kinect to be connected up to Windows via USB. There are also versions of the Kinect designed with this adapter built in, they are called “Kinect for Windows”. Either will work with this.

A few GitHub Gist projects (here and here) describes how to set this up.
More to-the-point instructions can be found here (flatredball.com) and here (ridilabs.net).
I used the flatredball guide to set up and ended up with the YouTube clip above. It was pretty cool.

However I couldn’t for the life of me figure out how to replace the avatar. You know, the funky warrior guy in the video. I could adjust scaling but that was it.

But not all is lost, this MoPred blogger is the only evidence I could find to show that replacing the avatar is possible, back in 2012, with a copy of 3DSMax and Windows 7.
http://mopred.blogspot.com/2012/11/changing-avateering-avatar-in-kinect.html

Image result for replace xna avateering avatar

http://mopred.blogspot.com/2012/11/changing-avateering-avatar-in-kinect.html

I really didn’t want to sit down, get a copy of 3DSMax and a Windows 7 VM (for convenience and elimination of any compatibility issues) and do this properly. I might sometime in the future but this MoPred blogger is quite vague. He provides screenshots and proof that it works but I just need the will power to learn C#.

The video above shows me compiling the project again. The project builds, but I didn’t have my Kinect plugged in. Its just an example of what it might be like.

Anyway, thanks for spending your time to read this blog, and if your reading from the future, leave a comment, and like a video of mine (It’s really appreciated!)

And by the way, if you ever have any issues about or with this blog or project, or just want to share your results from it, create a thread in the website Forum. Thanks!