BBC Micro Owlet IDE – My first BASIC program

Hi there,
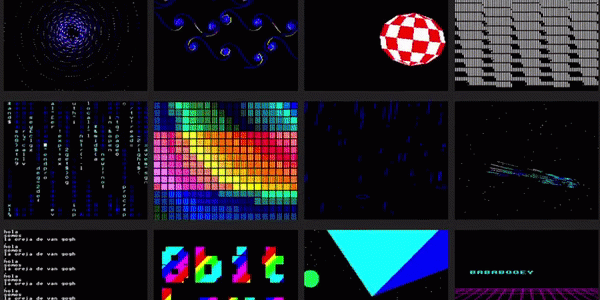
After my dad invested in a real BBC Micro model B to play with, I decided to learn some BBC basic. I found this online IDE called the Owlet Editor (BBC Micro Editor Beta) with thousands of code examples posted by twitter users and recorded from a twitter bot (BBC Micro Bot). Some demos are incredibly impressive! Have a look at the link below.

https://www.bbcmicrobot.com/owlet-test2.html

While figuring out BASIC, I found it was very similar to python, in some ways. I like how functions are in CAPITALS and stuff. You know what, I won’t bore you with the BASICS (pun intended, you’re welcome), but some of these smart tricks are seen all around game dev. These very techniques were used a lot in 90’s programming, and the YouTube channel Coding Secrets show some of the smart programming used in popular video games from Mickey Mania on the Sega Genesis and Sonic R on the Sega Saturn.
This video about 3D parallax scrolling in Mickey Mania is seen a lot in these Beeb demos.

(The BBC micro B model, which was and is the most popular model, only has 32k of memory. What’s more is twitter’s character limit, so all of these really blow my mind!)

Here’s my first BBC Basic program. It doesn’t do much, but it shouldn’t:

https://bbcmic.ro/d1ddles-first-code-link-really-long

REM Draw your own cuboid
REM using dimensions in pixels

MODE 2
REM use GCOL for graphic colours
MOVE 640, 512
GCOL 0,7

REM start x and y co-ordinates (bottom left of cube)
startx=480
starty=384

REM these measurements make a cube... even though it hardly looks like one
width=205
lengthx=160
lengthy=128
height=205
length = SQR(lengthx^2 + lengthy^2)

MOVE startx, starty
DRAW startx+width, starty
DRAW startx+width+lengthx, starty+lengthy
DRAW startx+width+lengthx, starty+lengthy+height
DRAW startx+width, starty+height
DRAW startx, starty+height
DRAW startx, starty
MOVE startx+width, starty
DRAW startx+width, starty+height
MOVE startx+width+lengthx, starty+lengthy+height
DRAW startx+lengthx, starty+lengthy+height
DRAW startx, starty+height
PRINT "Cube of"INT(length+0.5)"x"width"x"height"x"

Anyway, thanks for spending your time to read this blog, and if your reading from the future, leave a comment, and like a video of mine (It’s really appreciated!)

And by the way, if you ever have any issues about or with this blog or project, or just want to share your results from it, create a thread in the website Forum. Thanks!

Discord Python Bot GameTDB-Bot

Developing a discord python bot is easier than you think, and better yet you can host it for free 24/7 with replit.com! Let’s get started!

Create an account or sign in with Google, GitHub or Facebook, or log in to your account. Create a new python repl and here we are.

the replit.com interface


I’m not going to be teaching you any syntax so for writing your own code you’ll need to be a little familiar with python 3.

For those who learn in example, I’ve embedded my commented repl-example bot below, in which you can fork. For ease. Ooh and, if you would like to invite my GameTDB-Bot to your server, follow this link. GameTDB-Bot is probably the only discord bot that can scrape game metadata from Game Title Database sites. It supports Wii, PS3, DS, Switch, 3DS and WiiU games, more being added every day! Current game count as of writing is 37012.


Setup

So lets get set up.
Go over to uptimerobot.com, and create an account.

This service pings web pages (make a request) to see if they are available on the internet. Luckily we can utilise this (and the free 50 monitors) and the “Flask” module to create a HTTP(s) webpage that gets pinged from the Uptime Robot service and keeps the replit alive. This is necessary because replit.com shuts down scripts that are inactive for more than an hour, and therefore is needed if you want to run your script 24/7 as a discord bot.

Note: Replit.com’s “Hacker Plan” ($2 a month) get to have their repls running constantly without this, but it’s so easy to setup, why would you pay for something so niche?

Note2: If you get any issues complaining the modules don’t exist, try opening up a command prompt or switching to the shell in replit and installing the modules with the following command:

Make sure you’re working in the right directory (change directory = “cd”) if you’re not using replit.

pip install <module>
“pip install discord”

The above applies to further on in the tutorial.
“pip” is the “npm” of python.

keep_alive.py

Pinging our replit will only work if we have a “keep_alive.py” script that runs on start up. It contains a function that uses flask to host a web page using HTTP(s) which our Monitor pings every half-hour. Don’t worry if you don’t get it now, you will in good time. Or check out my commented example repl

Create a new file

Add a new file

Name it “keep_alive.py”

And paste in the following code.

from flask import Flask, request
from threading import Thread

app = Flask('')

@app.route('/')
def main():
    return "Do me a favour, visit: https://d1ddle.com"

def run():
    app.run(host="0.0.0.0", port=8080)

def keep_alive():
    server = Thread(target=run)
    server.start()

Basically this will start hosting a web page for your repl and print whatever is inside of return in the main() function (images below)

“keep_alive.py”

Once keep_alive.py is present, and referenced in your “main.py” (look at embedded example at top of page), log into the uptime robot dashboard and click “+ Add New Monitor”

Adding a new Monitor into Uptime Robot

And select the “HTTP(s)” Monitor Type

Selecting the “HTTP(s)” Protocol in Uptime Robot

You’ll be greeted with this screen. Make sure to enter the correct details for your repl like so:

Entering replit details into Uptime Robot

The only things that really matter are your URL and Monitoring Interval (Must be set from 5 minutes to 55 minutes as replit shuts down repls after an hour that haven’t been pinged.)
The URL can be found if you run the “keep_alive.py” script (mentioned earlier on) and grab the URL from the dialog box:

The URL from the dialog box created when running “keep_alive.py”

Or construct the URL like so:

"https://{Replit-name-with-hyphens-as-spaces}.{author-of-repl}.repl.co"

You can test this by opening your browser and entering the URL, but will only work like this if the “keep_alive.py” is present and called from “main.py”.

Testing the “keep_alive.py”

Once Uptime Robot is happy, and you can confirm it works from replit, you’re ready to go!
Let’s briefly cover sending messages and move onto sending jokes and memes in the chat in a second edition.
Here is a quick example script you can copy-paste and break it down. I find this is the easiest way to learn.

#import modules
import discord
import os
import keep_alive


#defines client and runs the keep_alive.py script
client = discord.Client()
keep_alive.keep_alive()


#if the bot writes the message, ignore it
@client.event
async def on_message(message):
  if message.author == client.user:
    return


#when a message is sent
@client.event
async def on_message(message):

  #if the message starts with 'hello'
  if message.content.startswith('hello'):

    #send 'hello user!' back to discord
    await message.channel.send("hello user!")

That’ll be it for this tutorial, but now everything is set up, running and ready to go, we can try out requesting jokes and memes from websites with JSON. See you soon!

Anyway, thanks for spending your time to read this blog, and if your reading from the future, leave a comment, and like a video of mine (It’s really appreciated!)

And by the way, if you ever have any issues about or with this blog or project, or just want to share your results from it, create a thread in the website Forum. Thanks!

Avateering with Blender (Kinect 360)

Avateering with custom characters using Microsoft’s solutions proved to be pretty difficult. That’s why I decided to try it out with Blender.

Interested in Microsoft’s XNA Solution? I did it too, here.
My YouTube video that I posted about this is below too.

Blender

Believe it or not, the movements from this animation were sourced from me, prancing around in front of a Kinect 360 in my conservatory.
This is thanks to an open-sourced program called kinect-openni-bvh-saver, which can record Kinect body tracking into a .bvh, which can be applied to rigs like the Mario in the video.

Installation and Use

Download the bvh saver (for windows) here (meshonline.net) – should be named mocap-x86-binary.zip and be 106MB in size – unzip it into a safe place (documents, etc).
Run the “mocap.exe” inside of the “bin” folder from root, and a cmd and window should pop up. If not, make sure your Kinect is plugged in. This window shows the camera feed as well as skeleton data. The .bvh file starts recording as soon as a skeleton is found.
Once the task/window is closed, the .bvh is saved to the “data” folder in the root of the installation.

Notes:
1. If none of this works, try and:
-Download Kinect for Windows SDK 1.8, install the SDK.
-Download OpenNI 2 SDK Binaries, install the SDK.
-Download NiTE-Windows-x86-2.2.zip, install the SDK.
-Download opencv 2.4.11 Win Pack, install the SDK to the root of drive C:.
2. Visit the GitHub page and read through the other information.
3. Make sure your Kinect is an Xbox 360 Kinect and not an Xbox One. This program will only work with Xbox 360 Kinects. However, it will work with up to 3 (and maybe more) !

I assume something similar is achievable with Kinect Studio, but it didn’t quite fit for avateering (I think :/ – pls leave a comment if you know anything about this) in the time frame I wanted.

The model was only a mesh when I imported it, but it didn’t really matter because the .bvh creates an animated rig when imported into blender anyway. So do some automatic weight painting, and if something is wrong you’ll have to manually paint. For example, Mario’s yellow buttons are not the same mesh as his overalls and were some reason auto weight-painted to his wrists. If you have no clue what I am talking about, learn more about weight painting in blender.

Once your animated rig is painted onto your model and it looks ok, you can export it. Want to export as an mp4? Here is the guide I used.
More info on exporting animations can be found in the blender documentation.

That should be pretty much it! Record your movements and transform yourself into whatever character you like!

Anyway, thanks for spending your time to read this blog, and if your reading from the future, leave a comment, and like a video of mine (It’s really appreciated!)

And by the way, if you ever have any issues about or with this blog or project, or just want to share your results from it, create a thread in the website Forum. Thanks!

XNA Game Studio for Visual Studio 2017 (Kinect 360 + Xbox 360)

An unofficial XNA Game Studio adaptation allows for XNA programs to execute on Windows 10.

The custom install allows Visual Studio 2017 to build the XNA Game Studio programs. Of course, I used the Kinect 360 to build an Avateering demo, which is basically a model that maps to your body movement in real time, and this is how it was done.

What is XNA Game Studio?

Microsoft XNA is a freeware set of tools with a managed runtime environment that Microsoft developed to facilitate video game development. XNA is based on .NET Framework, with versions that run on Windows and Xbox 360. XNA fully supports Kinect 360, and so when I wanted to mess with it I could either:

  • Write my own program with Kinect 360 support (from scratch)
  • Use XNA in some way

And that’s when I came across these.

Using Visual Studio

First you’ll need the Kinect 360 SDK from Microsoft. Version 1.8 is the latest compatible with Kinect 360. Don’t forget the Developer Toolkit, which includes examples and demos you can try. This also involves the files for the XNA Avateering demo mentioned earlier in the article.

Your Kinect 360 will also need an adapter, which allows the Kinect to be connected up to Windows via USB. There are also versions of the Kinect designed with this adapter built in, they are called “Kinect for Windows”. Either will work with this.

A few GitHub Gist projects (here and here) describes how to set this up.
More to-the-point instructions can be found here (flatredball.com) and here (ridilabs.net).
I used the flatredball guide to set up and ended up with the YouTube clip above. It was pretty cool.

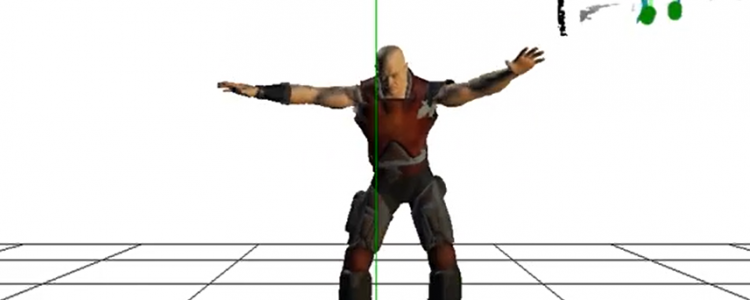
However I couldn’t for the life of me figure out how to replace the avatar. You know, the funky warrior guy in the video. I could adjust scaling but that was it.

But not all is lost, this MoPred blogger is the only evidence I could find to show that replacing the avatar is possible, back in 2012, with a copy of 3DSMax and Windows 7.
http://mopred.blogspot.com/2012/11/changing-avateering-avatar-in-kinect.html

Image result for replace xna avateering avatar

http://mopred.blogspot.com/2012/11/changing-avateering-avatar-in-kinect.html

I really didn’t want to sit down, get a copy of 3DSMax and a Windows 7 VM (for convenience and elimination of any compatibility issues) and do this properly. I might sometime in the future but this MoPred blogger is quite vague. He provides screenshots and proof that it works but I just need the will power to learn C#.

The video above shows me compiling the project again. The project builds, but I didn’t have my Kinect plugged in. Its just an example of what it might be like.

Anyway, thanks for spending your time to read this blog, and if your reading from the future, leave a comment, and like a video of mine (It’s really appreciated!)

And by the way, if you ever have any issues about or with this blog or project, or just want to share your results from it, create a thread in the website Forum. Thanks!